NMI, a gas MIRN, or a water meter reference. This guide walks you through creating a connection and wiring it into the rest of your data: a site, its meters and reads, and a retail account. For the list view and column reference, see Connections.
Creating a connection
Open the create drawer
Navigate to the Connections page from the sidebar. On the Connections tab, click the + button in the top-right corner to open the Create New Connection drawer.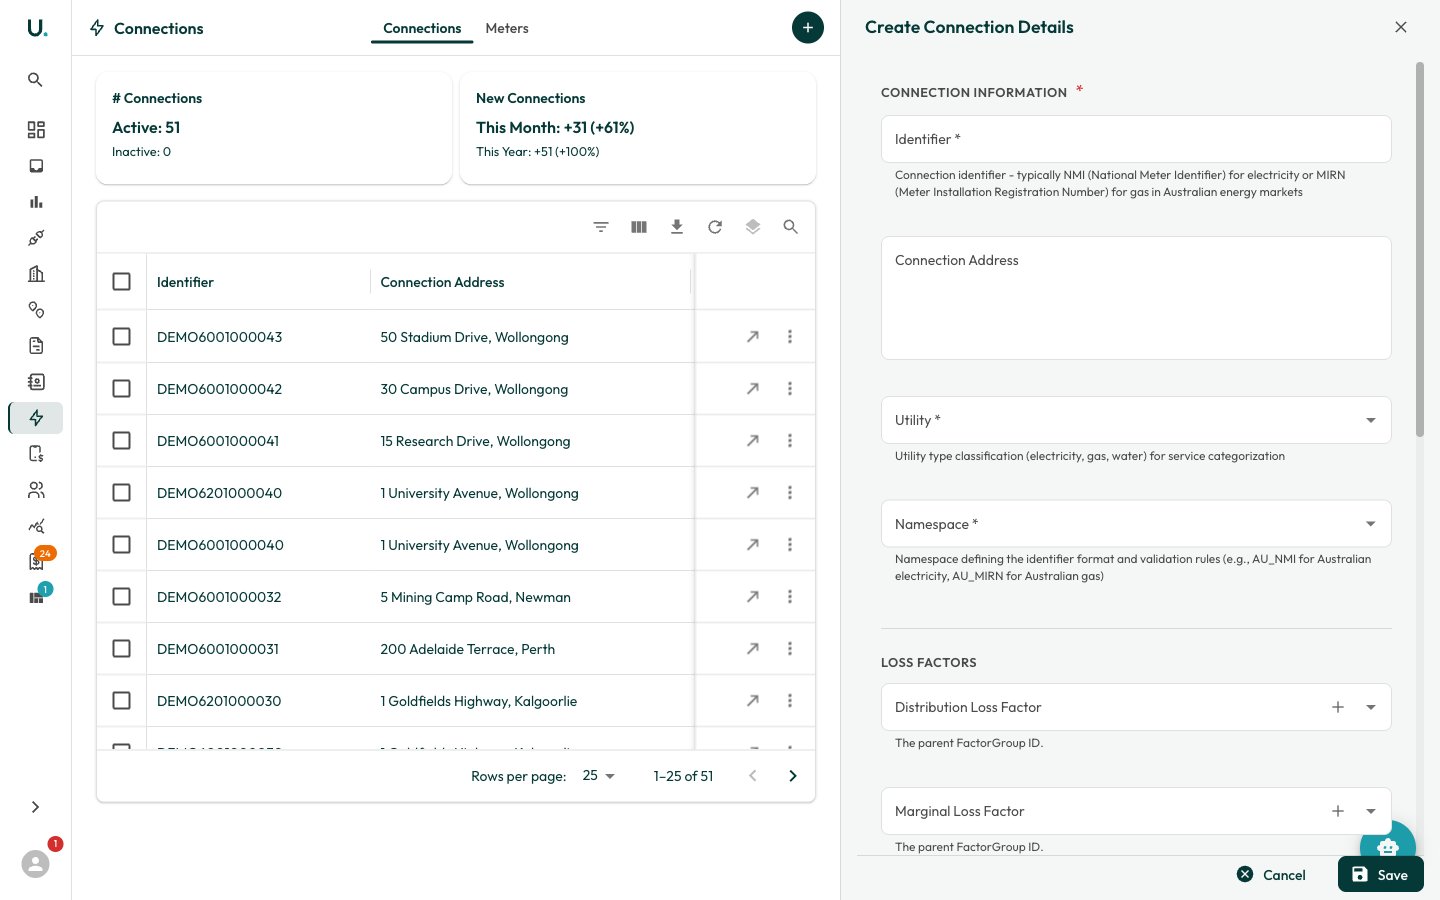
Enter the identifier and key fields
Fill in the Connection Information section:
- Identifier (required) — The meter point identifier: the
NMIfor electricity, theMIRNfor gas, or the meter reference for water. - Connection Address — The physical address or location of the connection.
- Utility (required) — Select the utility type (Electricity, Natural Gas, or Water). This drives the consumption units and charting.
- Namespace (required) — The identifier market or namespace (for example,
AU_DEFAULTfor Australian connections).
- Loss Factors — Distribution Loss Factor and Marginal Loss Factor groups (electricity).
- Annual Usage — Annual Utility Cost, Annual Utility Consumption, and the consumption Quantity unit.
- Dates — Date Established and Date Abolished.
Use the right identifier for the utility: a
NMI (National Meter Identifier) for electricity, a MIRN (Meter Installation Reference Number) for gas, and the meter reference for water. The create drawer does not ask for a site — you link the connection to a site as a separate step below.Linking, metering, and retail accounts
From the connection detail page, the header actions handle the remaining relationships.Link the connection to a site
Click Add to Site (the primary header action) to open the Add Connection to Site drawer, choose the site, and save. Once linked, the connection’s location appears on the Overview map. You can also allocate the site from the Settings tab.
Add meters and registers
Click New Meter to add a physical meter to the connection. Each meter has one or more registers (measurement channels) that record the time-series reads. See Meters, Registers & Reads for the full metering hierarchy.
Attach a retail account
Click New Retail Account to record the retailer’s account reference for this connection. Retail accounts are how incoming invoices get matched to the correct connection — see Retail Accounts.
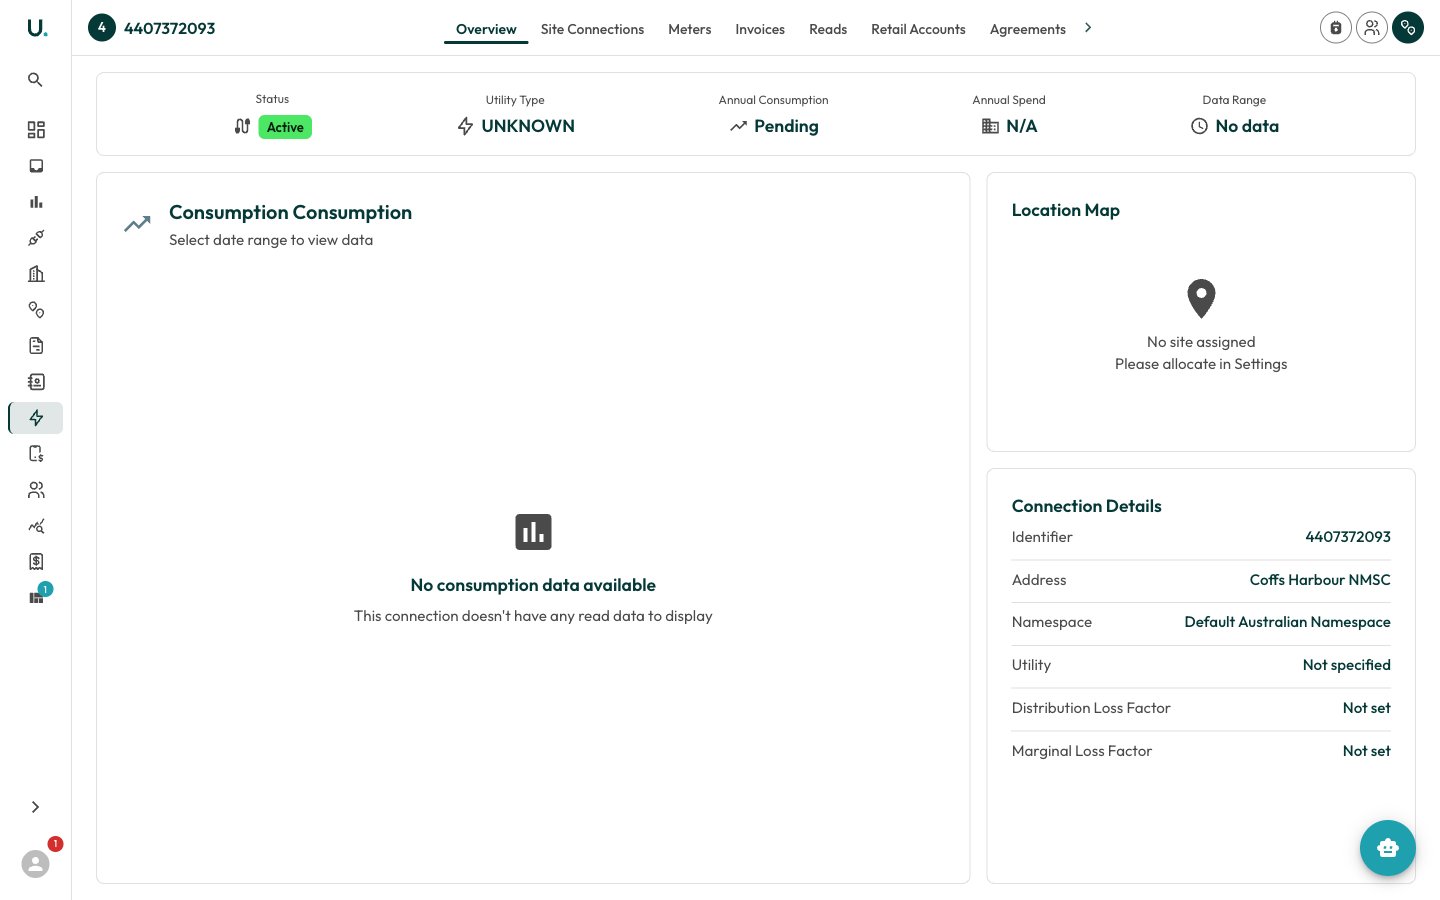
Connection detail tabs
The detail page organises everything about a connection into tabs:| Tab | What it’s for |
|---|---|
| Overview | Status, utility type, annual consumption and spend, a consumption chart, and the location map |
| Site Connections | The site links for this connection |
| Meters | The physical meters installed at the connection — see Meters |
| Invoices | Invoices billed against this connection |
| Reads | Aggregated time-series consumption reads, with charting and CSV export |
| Retail Accounts | The retailer account references attached to this connection |
| Agreements | The energy agreements covering this connection |
| Quantity Constants | Conversion constants applied to this connection’s quantities |
| Settings | Edit connection details and allocate the site |