Both sections are plan-gated and permission-gated. They are available only on the Business and Enterprise plans and are hidden on Starter. Portal & Domain requires manager access; Single Sign-On requires administrator access. If you don’t see a section, your plan or role doesn’t include it — contact your organisation administrator.
Portal & Domain
The white-label portal lets you serve your customers a branded experience on your own domain. Configuration runs top to bottom in three parts: Domain, Deployment, and Theme.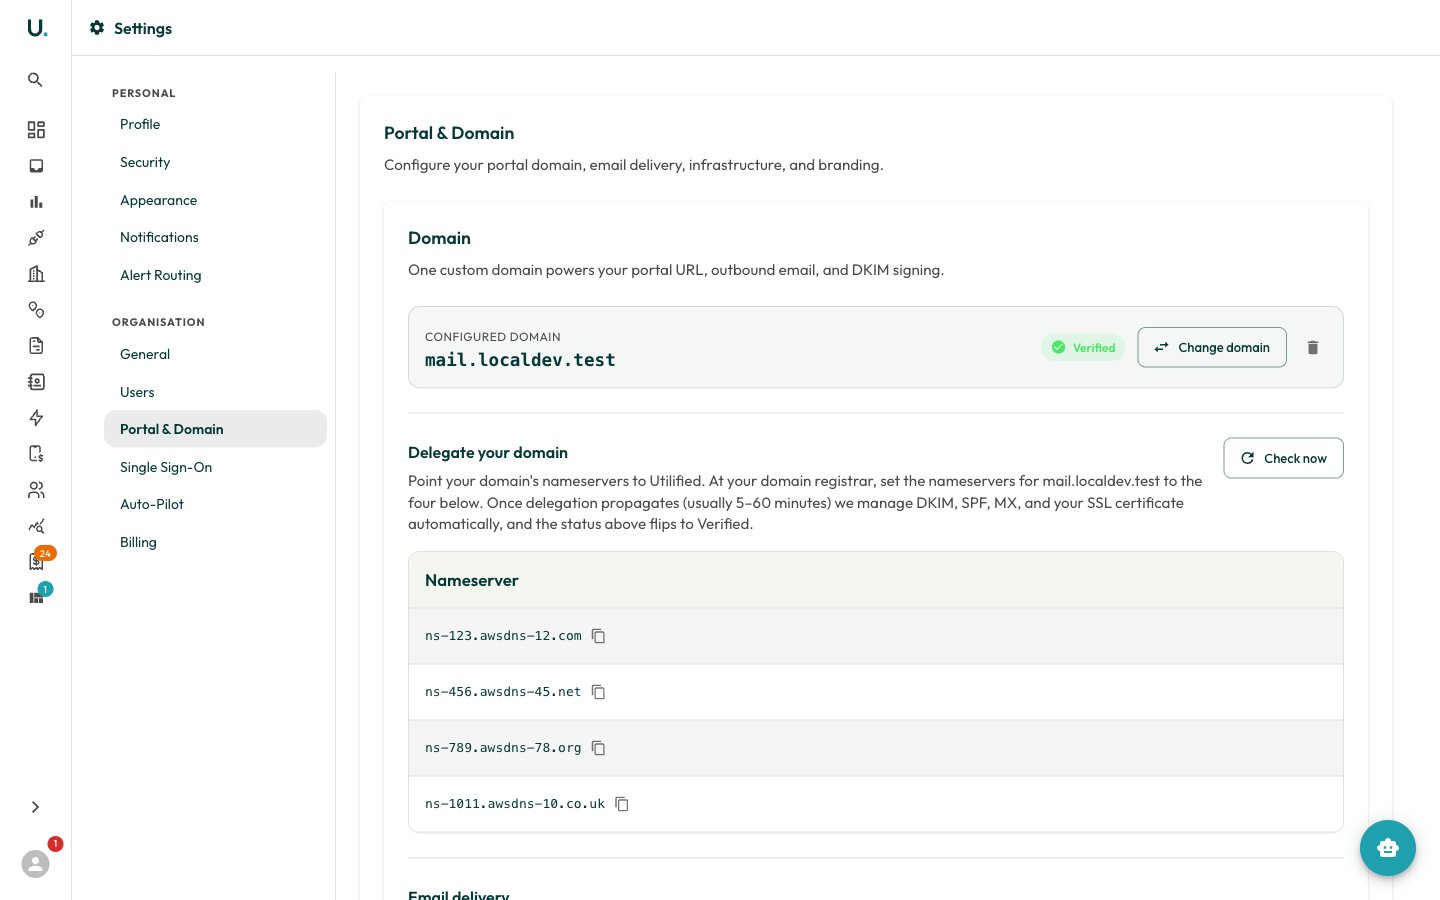
Domain
One custom domain powers your portal URL, outbound email, and DKIM signing. Use a subdomain you control, such asportal.yourcompany.com.au.
Add your domain
Enter the subdomain and click Add Domain. Utilified provisions a hosted zone for it.
Delegate your nameservers
Under Delegate your domain, copy the four nameservers shown and set them as the nameservers for your domain at your registrar. Utilified then manages DKIM, SPF, MX, and the SSL certificate automatically.
Wait for verification
The status badge moves from Awaiting DNS to Verified once delegation propagates — usually 5–15 minutes. The page re-checks automatically every 30 seconds; you can also click Check now.
Deployment
With a verified domain (hosted zone and certificate in place), click Deploy portal to stand up a dedicated portal instance. Deployment typically takes 3–5 minutes, after which the portal’s live URL is shown. The instance configuration (image version, resources) is managed server-side. Use Update to redeploy or Delete portal to remove it.Theme
The Theme editor controls white-label branding, with a live preview below:- Theme name — a descriptive label for the theme.
- Colours —
primary,secondary, andbackground. - Typography — separate font configuration for Body, Button, and Heading text.
- Branding & links —
logo_url,favicon_url,support_url,terms_of_use, andprivacy_policy.
Single Sign-On
UMS supports OpenID Connect (OIDC) single sign-on, with a built-in Microsoft 365 / Entra ID provider. Configuration lives under two tabs — SSO Configurations and User Mappings — with summary cards for providers, configurations, and active configs.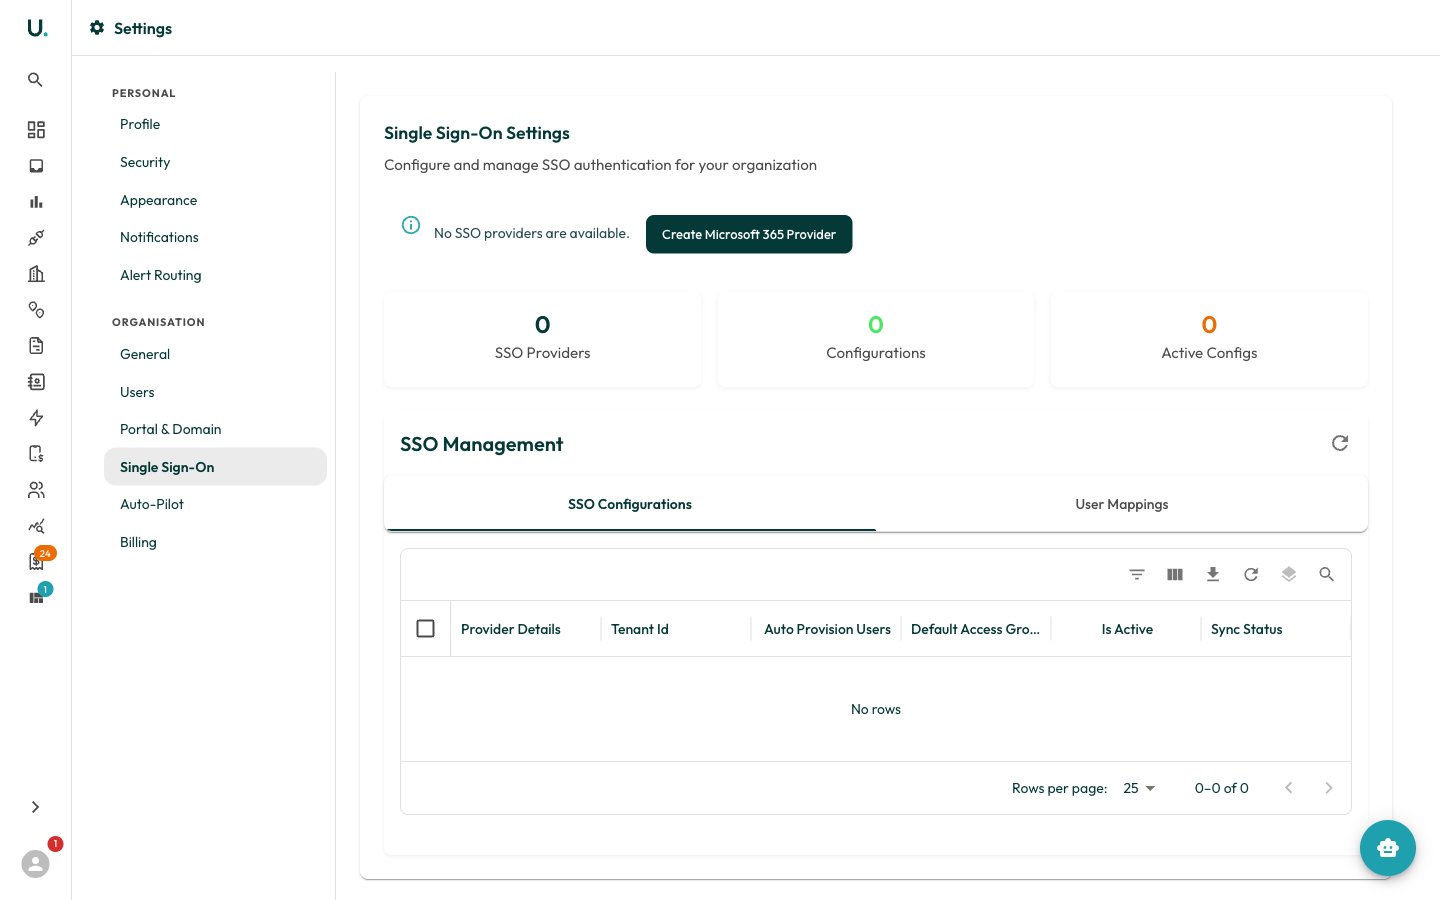
Create a provider
If no provider exists, click Create Microsoft 365 Provider to register the Microsoft 365 / Entra ID OIDC provider.
Add a configuration
Click Add Configuration and complete the form:
client_id— the application (client) ID from your identity provider.client_secret— the client secret from your identity provider.tenant_id— the directory (tenant) ID from your identity provider.
Set user provisioning
Toggle Automatically create users on first login (
auto_provision_users), then choose a Default Access Group — Account Viewer, Account User, Account Manager, or Organisation Admin. Optionally restrict sign-in to specific Allowed Email Domains (leave empty to allow all).Adjust claim mapping (optional)
Under Advanced Settings, edit the
claim_mapping JSON to map identity-provider claims to user fields (email, first_name, last_name, username).