These sections require manager or admin access. The Settings rail is permission-aware — sections you can’t access are hidden, not greyed out. If a section described here is missing from your rail, ask your organisation administrator to check your role.
General
The General section manages your organisation’s profile and business information.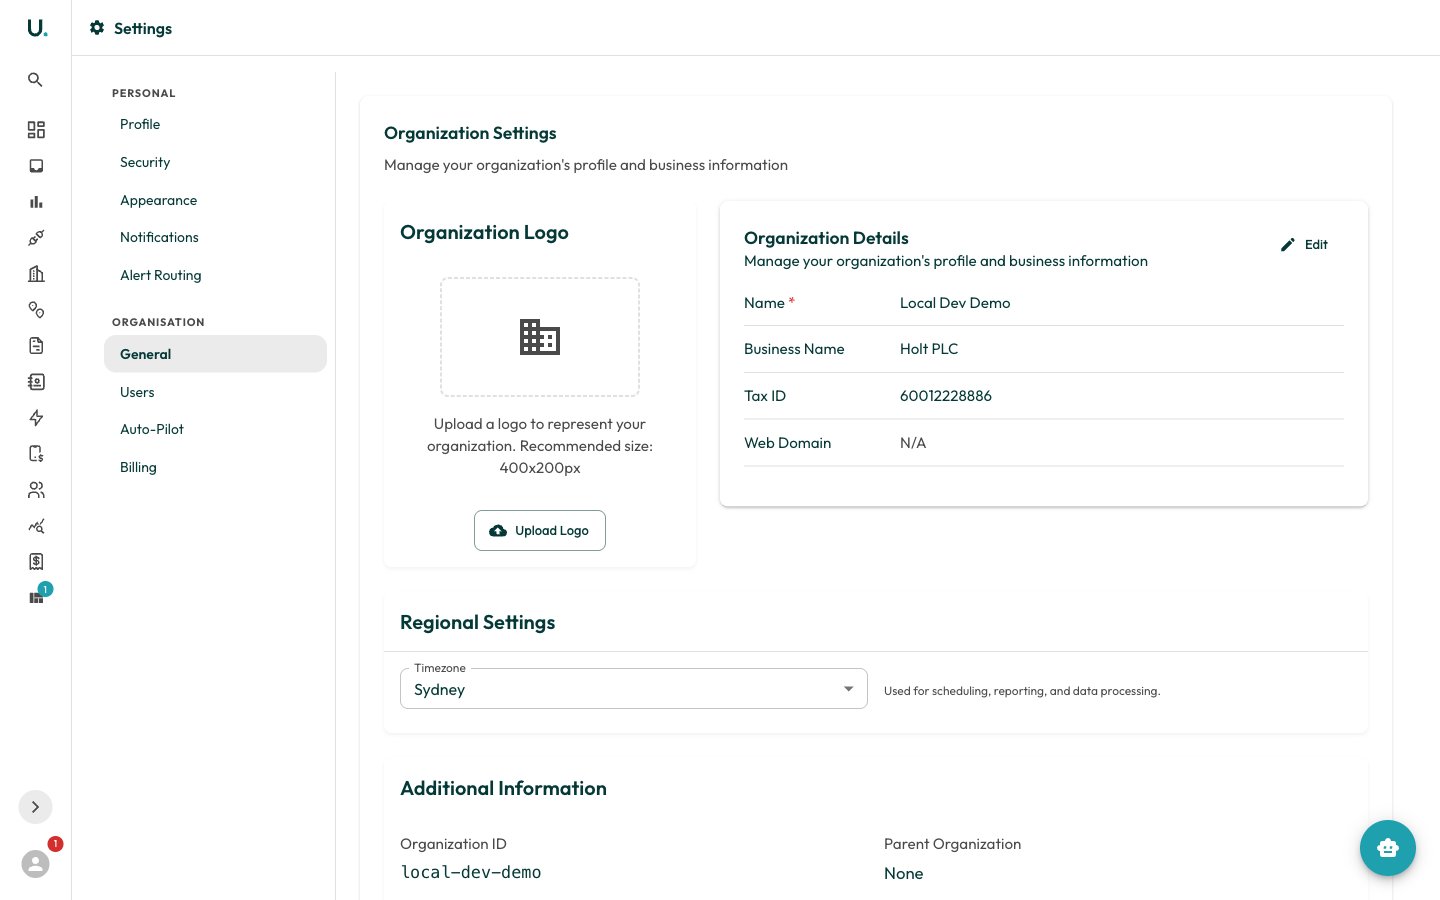
- Organisation Logo — Upload a logo to represent your organisation. Use an image file up to 5 MB; the recommended size is 400×200 px.
- Organisation Details — Edit your organisation’s name and business details inline. Changes save per field.
- Regional Settings — Set your Timezone (Australian timezones only). This is used for scheduling, reporting, and data processing.
- Additional Information — Read-only reference values: your
Organisation IDandParent Organisation.
Users
The Users section is where you invite team members, assign roles, and deactivate access. Because the rail is permission-aware, this section appears only for managers and admins. For the full walkthrough, see Setting Up a User.Auto-Pilot
The Auto-Pilot section configures AI-powered automation for the invoice pipeline — letting high-confidence invoices flow from intake through validation without manual handling. Low-confidence items still surface in your Inbox for review. Toggle Enable Auto-Pilot to switch automation on. When it’s off, items continue through the pipeline manually via the Inbox and Invoices pages. The section also shows live Auto-processed, Manual overrides, and Automation rate stats once items have flowed through. Inbox stage- OCR confidence threshold — Records below this confidence (50–100%) are sent to manual review or AI re-extraction.
- Auto-create invoices from high-confidence OCR — Create invoices automatically when OCR confidence clears the threshold.
- Auto-archive email types — Select email types (for example, Overdue Notice, Payment Receipt) to auto-archive without entering the inbox queue.
- Auto-run validation — Run validation automatically after an invoice is created.
- Variance tolerance for auto-pass — Invoices within this variance (0–20%) of expected charges auto-pass.
- Require AI PASS recommendation — The AI must also recommend PASS before an invoice auto-passes.
Billing
The Billing section manages your plan, usage, and payments.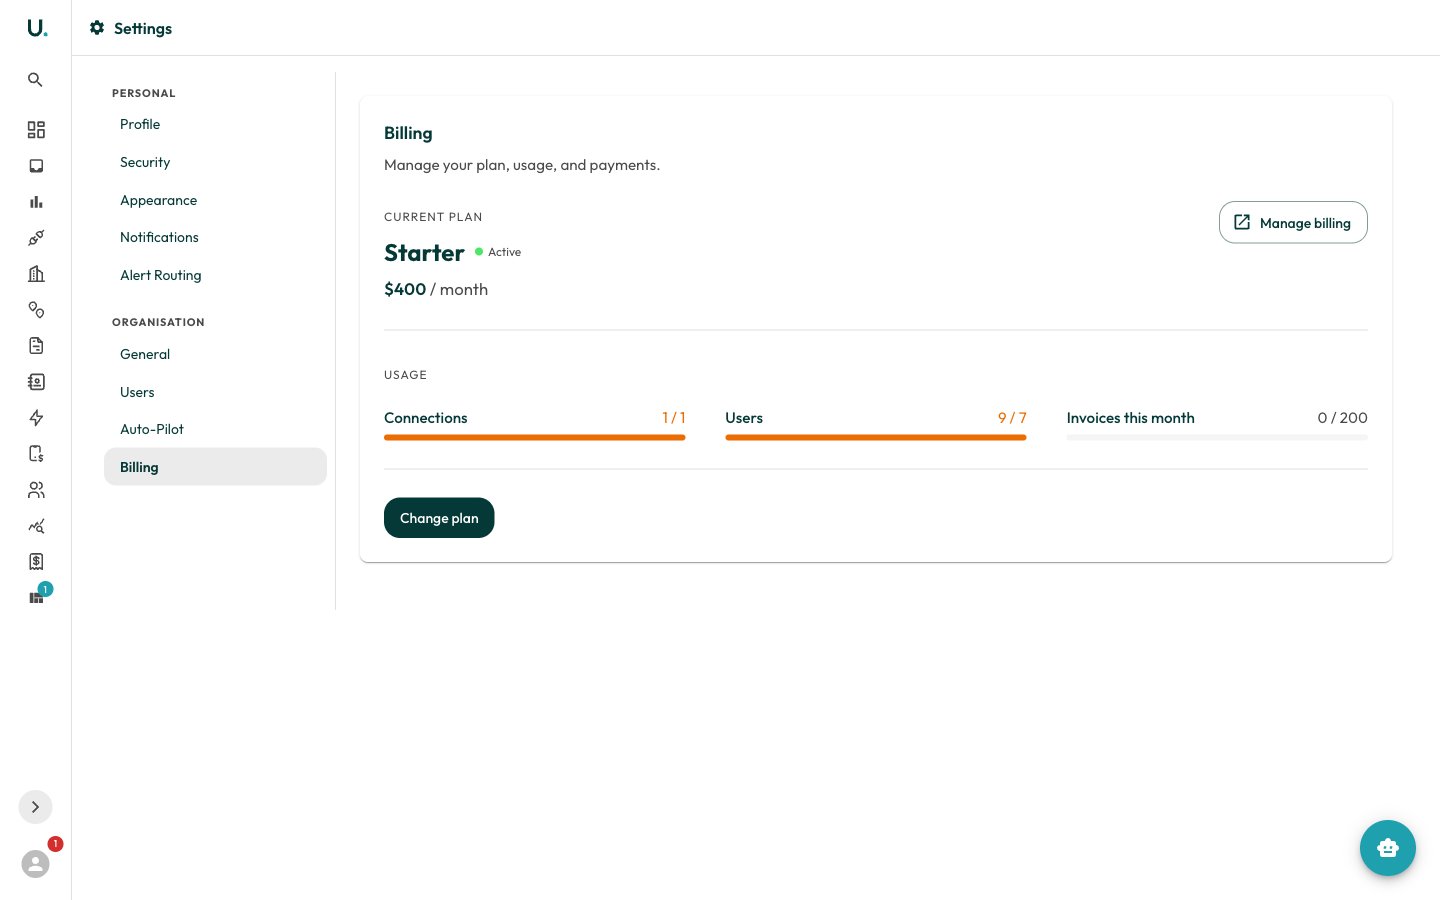
- Current plan — Your plan name, status (Active, Trial, or Cancelled), monthly price, and renewal date. Plans on a 12-month commitment show the commitment end date.
- Usage — Live meters for Connections, Users, and Invoices this month against your plan limits.
- Change plan — Open the plan picker to upgrade or switch plans.
- Manage billing — Open the Stripe billing portal in a new tab to update your payment method and view invoices.
If your organisation is billed directly by Utilified (manual billing), self-serve checkout and the Stripe portal are hidden. Contact us to change your plan.