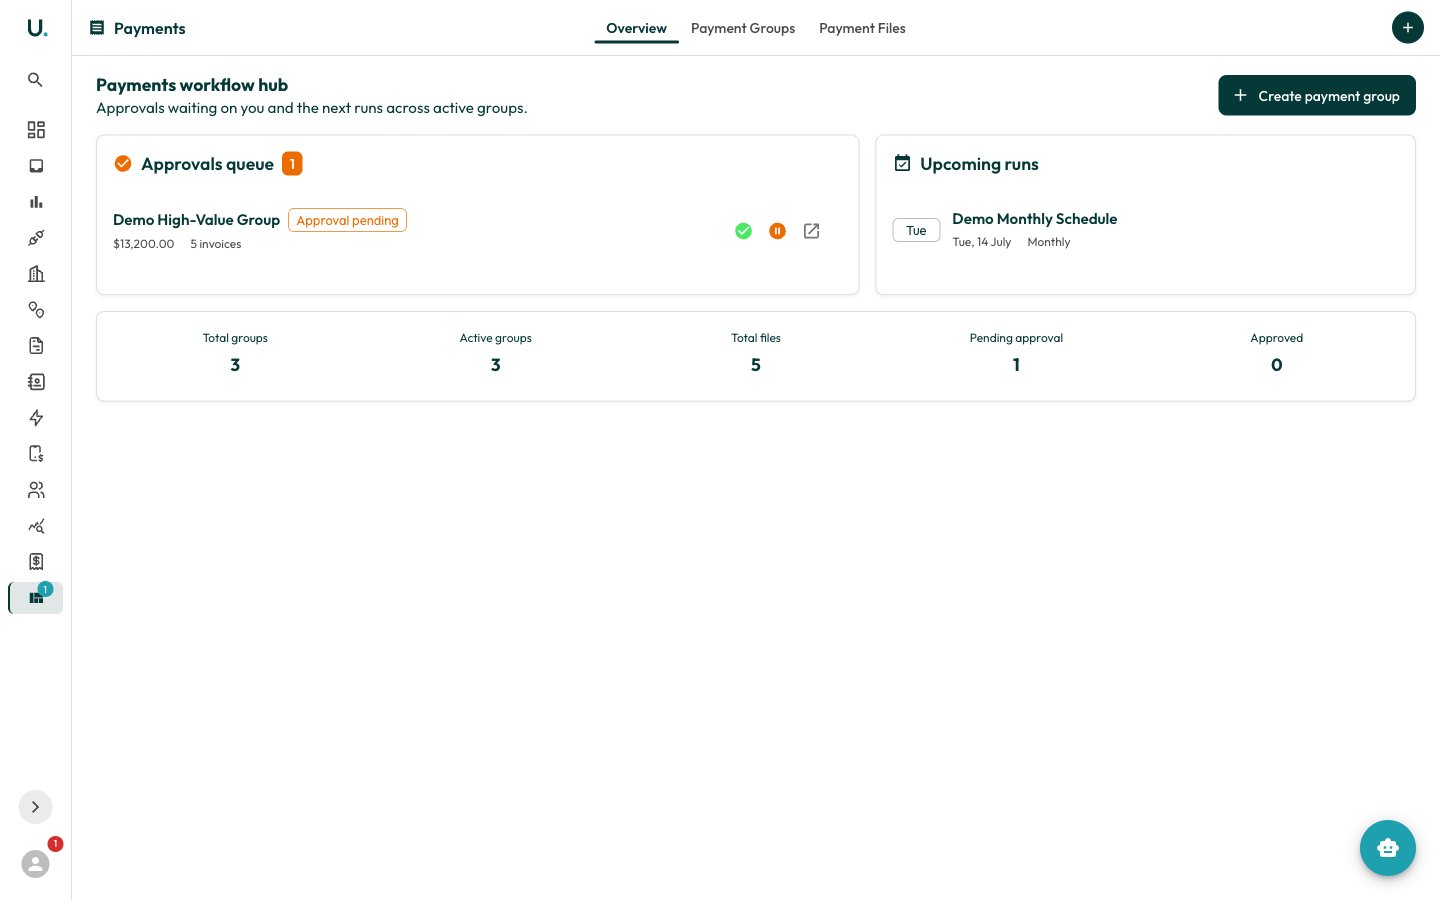
/invoices/payments). It has three tabs: Overview (an approvals + upcoming-runs hub), Payment Groups, and Payment Files.
Create a payment group
Click Create payment group to open the four-step wizard: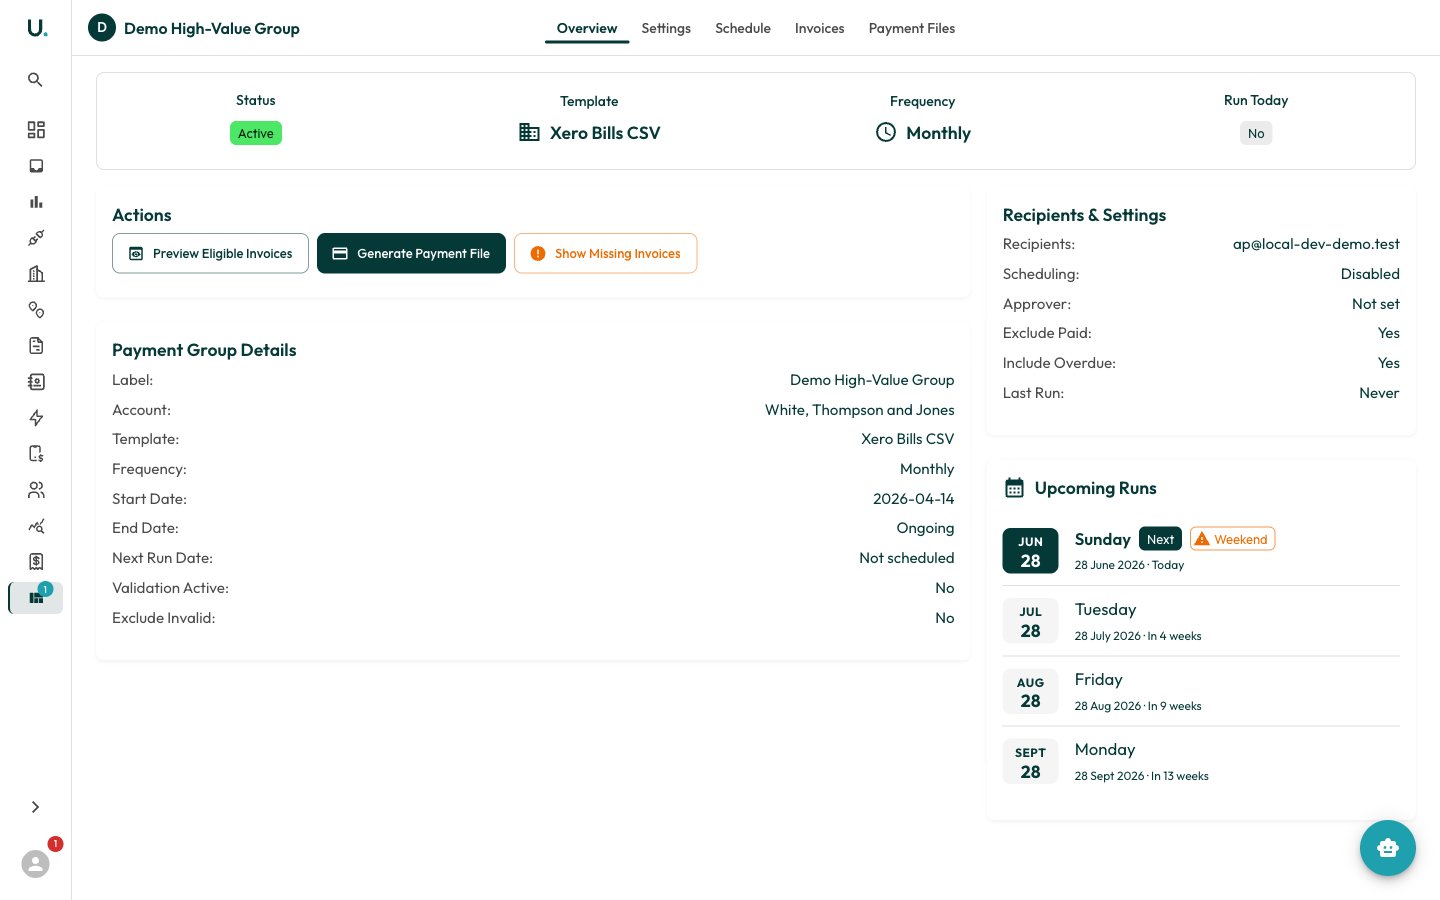
- Basics — set a
label, pick theaccount, choose atemplate, and set thestatus. The template is the export layout (for example Xero Bills CSV, MYOB Service Purchases, NetSuite Vendor Bill CSV, Australian Standard CSV, or Generic CSV). - Schedule — choose a
frequency(Weekly, Biweekly, Monthly, Quarterly), astartdate, and optionally enable scheduling. - Filters — narrow which invoices the group picks up:
suppliers,connections,min_amount/max_amount,min_days_old/max_days_old, plusinclude_overdueandexclude_paidflags. - Review & Distribution — set
recipients, anapprover, and adual_approval_threshold. The summary panel previews the schedule and active filters before you finish.
Preview and generate the payment file
Open the group and go to its Overview tab. Click Preview Eligible Invoices to see which invoices match the group’s account, date window, and filters. Tick or untick rows to include or exclude them for this run only — excluded invoices stay eligible for future runs.Use Show Missing Invoices to see invoices that were skipped and why (for example
Already paid, Already on a payment file, Validation failed, or Below minimum amount).When the selection looks right, click Generate Payment File, choosing a format (CSV, Excel (XLSX), PDF, or XML). This creates a payment file and links the chosen invoices to it.UMS generates an ERP/accounting export in the format above — not a bank ABA file. The export is shaped by the group’s
template. Hand the downloaded file to your finance system or bank for the actual transfer.Process the file
Open the new payment file from the Payment Files tab. While it sits in
CREATED or INVOICES_LINKED, click Process to render the file content and advance it to PROCESSED. If an underlying invoice changes later, use Refresh Content to re-render the file without changing its status.Submit for approval and approve
From a 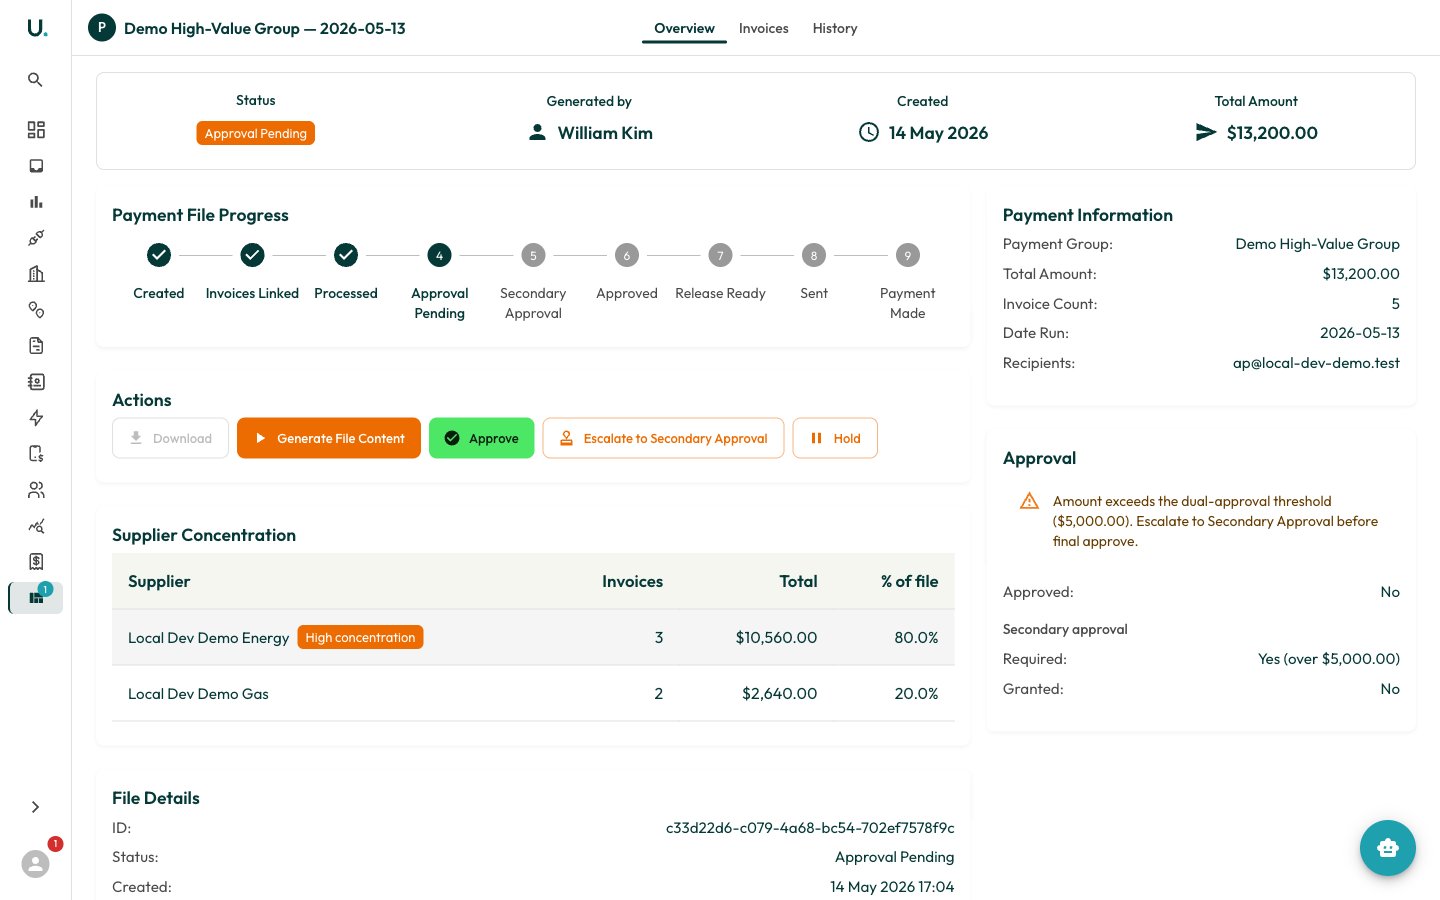
PROCESSED file, click Submit for Approval to move it to APPROVAL_PENDING. The approver then clicks Approve, optionally adding a comment that is recorded against the file.Send the file
Once the file is
APPROVED (or RELEASE_READY), click Send to dispatch it to the configured recipients and move it to SENT. Sending records the run date. If no recipients are set on the group, the dialog warns you before you proceed.Mark the payment as made
After your bank or ERP confirms the transfer, open the file and click Mark Payment Made (optionally adding notes) to close it out at
PAYMENT_MADE. If the downstream system rejects the payment instead, click Mark Rejected — the file moves to PAYMENT_REJECTED, and you can use Reissue Rejected Lines to spin up a fresh payment file containing only the rejected invoices.Payment file statuses
The file’s Overview tab shows a progress stepper tracking the lifecycle:CREATED → INVOICES_LINKED → PROCESSED → APPROVAL_PENDING → APPROVED → RELEASE_READY → SENT → PAYMENT_MADE. A file can also be placed on MANUAL_HOLD (with a required reason) at any point before payment, then released with Release Hold.
Working the approvals queue
The Payments Overview tab surfaces every file inAPPROVAL_PENDING or SECONDARY_APPROVAL_PENDING across the organisation. Approve or hold each item inline, or open it to act on the full file detail. Use this as your daily worklist rather than scanning the Payment Files tab manually.