/settings.
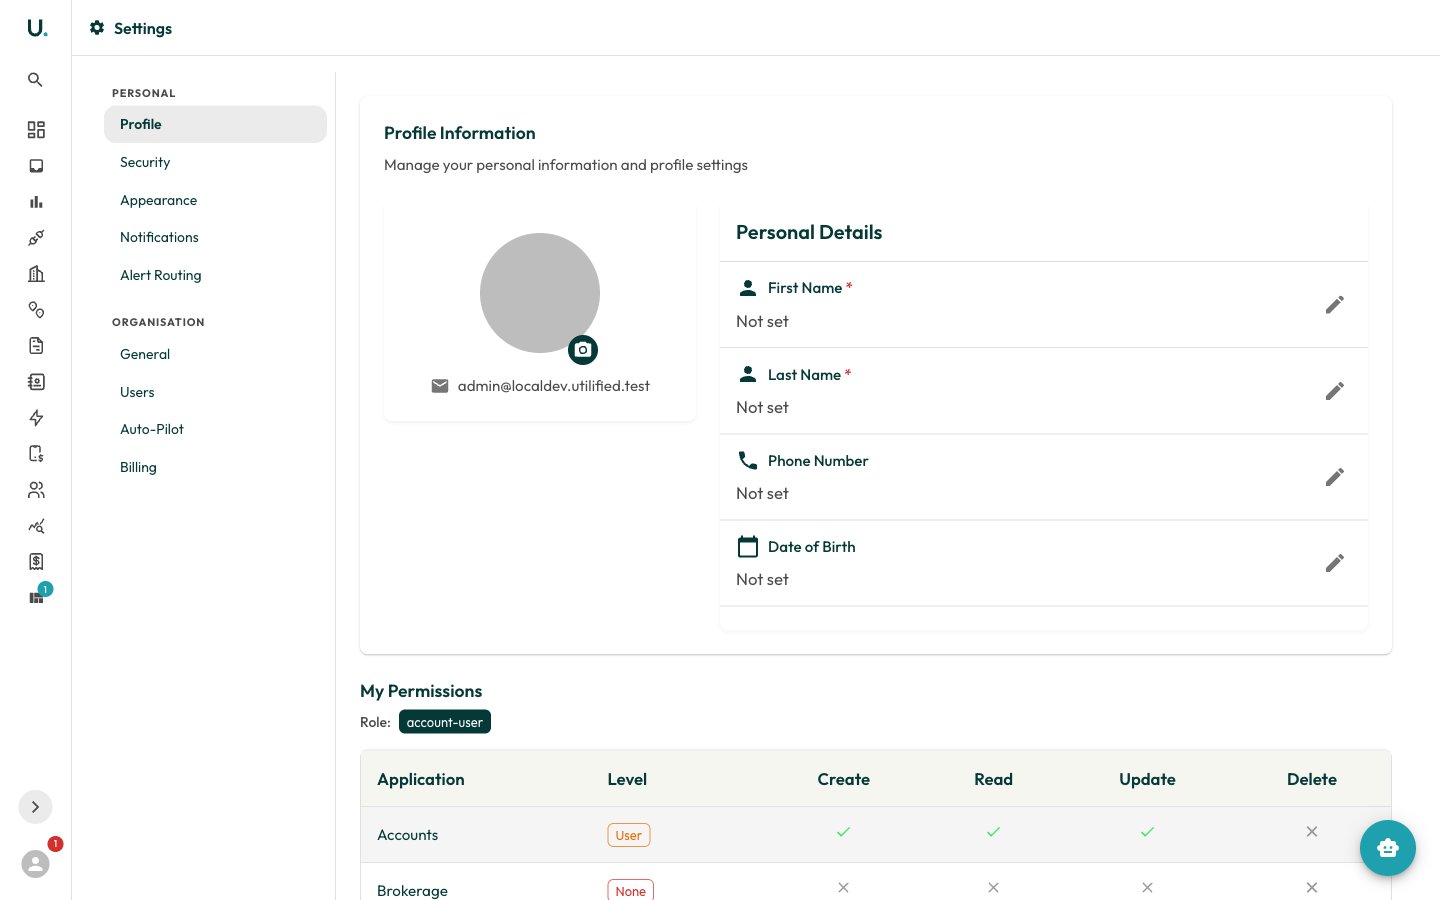
Profile
The Profile section manages your personal details and profile picture.- Profile picture — Click the camera badge on your avatar to upload an image. Files must be a valid image type and under 5 MB.
- Personal details — Each field has a pencil icon to edit inline; click the save icon to confirm or cancel to discard:
first_nameandlast_name— required, up to 150 characters.phone_number— optional.date_of_birth— optional.
email is shown alongside your avatar but is not editable here. Below the form, My Permissions displays a read-only matrix of what your access group can create, read, update, and delete across each application.
Security
The Security section manages your password and two-factor authentication (2FA). A Security Score at the top reflects which protections you have enabled.- Change Password — Enter your Current Password, then a New Password (at least 8 characters, and different from the current one) and confirm it.
- Two-Factor Authentication — Add one or more methods: Authenticator App (recommended), Email Verification, or Backup Codes. Each active method is listed as a device you can remove (password required) or, for backup codes, regenerate.
Enable two-factor authentication
Configure the authenticator
For an authenticator app, scan the displayed QR code with your app (for example Google Authenticator or Authy), then enter the 6-digit code it generates. For email, click Send Verification Email and enter the code sent to your inbox.
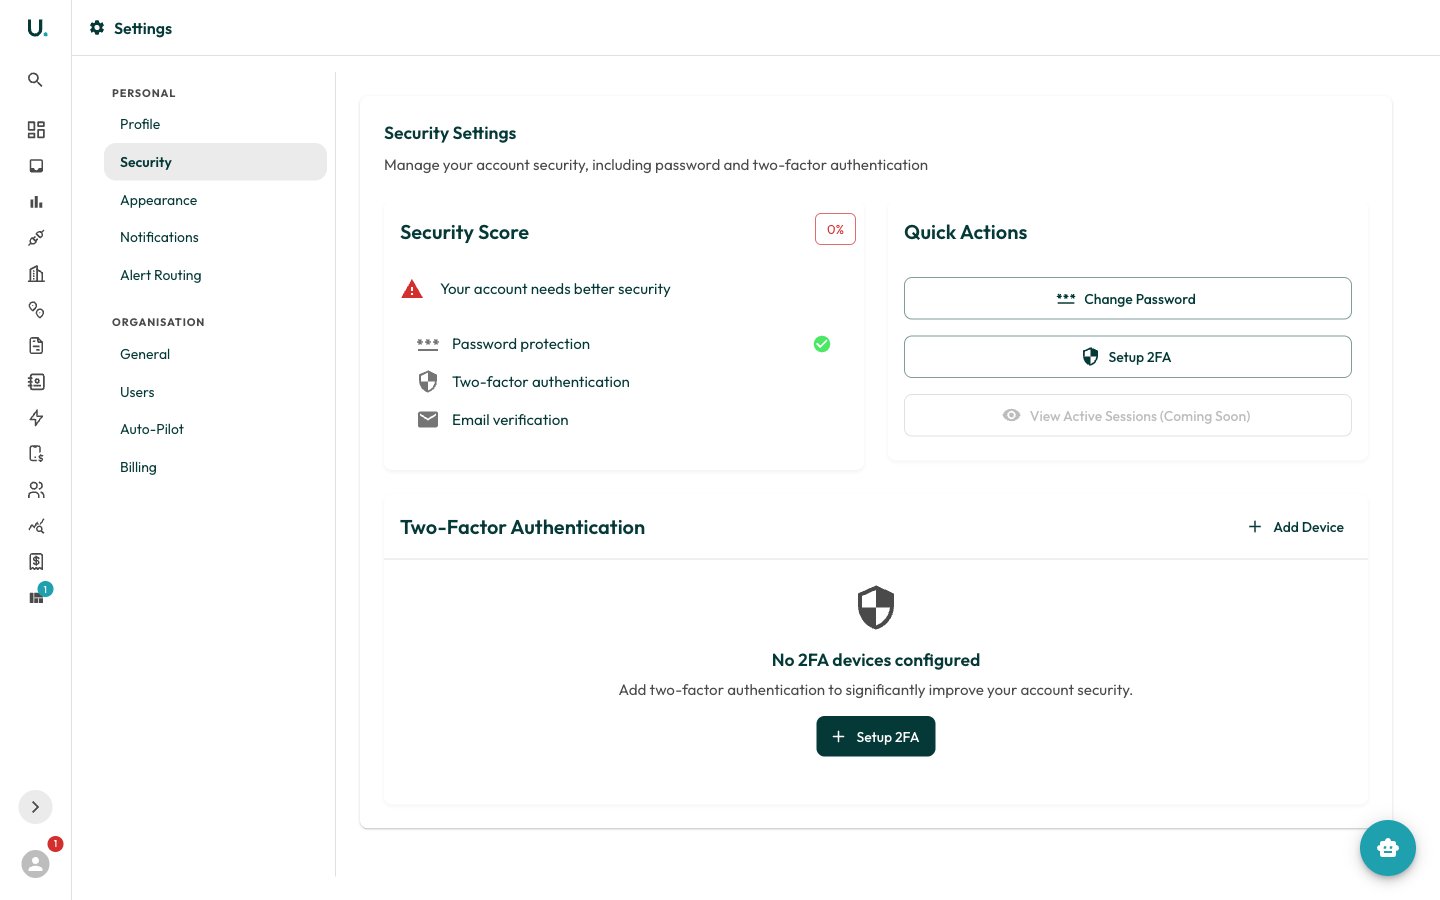
Regenerating backup codes invalidates your existing codes. Save the new codes somewhere secure — they are shown only once.
Appearance
The Appearance section controls the application theme for your device. Choose a Theme Mode:- System — Follow your operating system’s light or dark setting.
- Light — Always use the light theme.
- Dark — Always use the dark theme.
Notifications
The Notifications section manages your notification preferences. This is distinct from the in-app Notifications drawer, which lists the messages you have received — see Notifications for that.- Browser Notifications — Enable real-time browser notifications, and use the test button to confirm they work.
- Notification Overview — See your unread count, notifications from the last 24 hours, and browser-notification status, with a Mark All as Read action.
- Priority Breakdown — A count of notifications by Urgent, High, Normal, and Low priority.
- Notification Subscriptions — Toggle a switch for each subscribable notification type to opt in or out. Subscriptions are delivered both by email and in-app.
Alert Routing
The Alert Routing section defines rules that forward incoming alerts and notifications to specific contacts based on event type and filters. Existing rules are listed in a table showing each rule’s Name, Account, Event Type, Enabled state, recipient count, and filter summary.Create a routing rule
Click Create Rule and complete:- Name — required.
- Account — scope the rule to a single account, or leave as All accounts (org-wide).
- Event Type — required; the event that triggers the rule.
- Enabled — toggle the rule on or off.
- Filter Criteria — narrow which messages match:
- Email Types — one or more types (for example
INVOICE,OVERDUE_NOTICE,RATE_CHANGE_NOTICE). - Sender Contains — comma-separated patterns matched against the sender (for example
origin.com.au, agl.com.au). - Subject Contains — comma-separated patterns matched against the subject (for example
overdue, reminder).
- Email Types — one or more types (for example